Trikdis FLEXi Keypad SK-LCD button – Kurzanleitung
- 01.07.2025
- Manufacturer: Trikdis


Funktionsübersicht
- Date
- Time
- Area Status Indication
- Area Control Buttons
- Menu Button
Alarm System (Away) ARMING
- Make sure no zones are violated.
- Drücken Sie [

 ].
]. - Enter your user code.
- Wählen Sie die Bereich.
- Drücken Sie [
 ].
]. - Leave the area within the exit delay time.
When the system is armed, the  icon appears on the display.
Alarm System DISARMING
- Enter your user code.
- Wählen Sie die Bereich.
- Drücken Sie [].
When the system is disarmed, the  icon appears on the display.
NACHT- / SCHLAFMODUS
The building's perimeter is secured, free movement inside is allowed. Alarms upon door/window opening.
- Drücken Sie [
 ].
]. - Enter your user code.
- Wählen Sie die Bereich.
- Drücken Sie [].
- NIGHT arming activates immediately.
The  icon appears on the display when NIGHT arming is active.
STAY-Modus (Zuhause)
There is an entry delay. Free movement inside is allowed.
- Drücken Sie [
 ].
]. - Enter your user code.
- Wählen Sie die Bereich.
- Drücken Sie [].
- STAY arming activates immediately.
The  icon appears on the display when STAY arming is active.
To change the area status, simply enter the user code and select the desired area. To clear entered commands, press the [ ].
].
Adding a new code / Modifying an existing one:
- Drücken Sie [
 ], then the [0].
 - Mastercode eingeben (Standard: 1234).
- Enter the two-digit serial number of the user (e.g., 02).
- Neuen Code zweimal eingeben.
- Select the areas assigned to the user.
- Drücken Sie [].
To exit, press the [] button again.
Hinweis
- Master code serial number: [01]
- Codes consist of 4 digits.
Deleting a user code:
- Drücken Sie [], then the [0].
- Mastercode eingeben.
- Enter the two-digit serial number of the user (e.g., 02).
- Drücken Sie []. (A confirmation sound will be heard.)
- Drücken Sie [].
To exit, press the [] button again.
Überbrückung aktivieren:
- Drücken Sie [], then the [6].
- Enter your user code.
- Zweistellige Zonennummer(n) eingeben. Mehrere möglich, z. B. 05 dann 11.
- Drücken Sie []. ( Symbol erscheint im Display, wenn eine Zone überbrückt ist.)
Überbrückung deaktivieren:
Aktivierungsschritte wiederholen.
Notfallsignal senden:
- Polizei – Taste [1] 3 Sekunden gedrückt halten
- Notarzt Aid – Taste [4] 3 Sekunden gedrückt halten
- Feuerwehr – Taste [7] 3 Sekunden gedrückt halten
Hinweis: Funktioniert nur mit aktivem Fernüberwachungsabonnement.
Brand-/Rauchmelder zurücksetzen:
- Drücken Sie [] button for 3 seconds.
Hinweis: Brand- und/oder Rauchmelder setzen sich nach einem Alarm nicht automatisch zurück. Manuelles Zurücksetzen erforderlich.
Button Brightness
- Drücken Sie [], then buttons [5] and [3].
- Adjust the brightness with buttons [2] / [8].
- To save [], to exit [].
LCD Display Brightness
- Drücken Sie [], then buttons [5] and [2].
- Adjust the brightness with buttons [2] / [8].
- To save [], to exit [].
Keypad Volume
- Drücken Sie [], then buttons [5] and [1].
- Adjust the volume with buttons [2] / [8].
- To save [], to exit [].
Disabling Standby Light
This setting controls whether the keypad backlight illuminates even when the device enters standby mode (i.e., has not been pressed for a while).
- Drücken Sie [], then buttons [5] and [4].
- By pressing button [1], you can set the backlight to illuminate in standby mode, while with button [2], you can set it to turn off.
- To save [], to exit [].


Das „SK-LED button"-Tastenfeld verwaltet 64 Zonen und 8 Bereichen. Bereichen können einzelnen Tastenfeldern zugewiesen werden. Verfügbar ab Zentrale FW:SP3_xxx4_0121.
Tags:
Related Articles
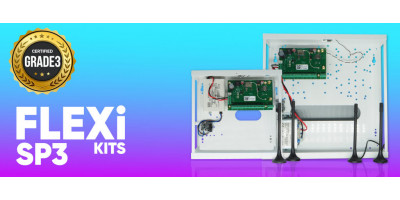
Einführung des FLEXi SP3 – Die beste intelligente Alarmzentrale
- 10.08.2020
Das Trikdis FLEXi SP3: intelligente Alarmzentrale mit integriertem Kommunikator – vielseitig, schnell und kosteneffizient.
Read More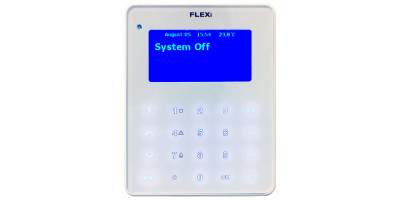
Firmware-Update-Prozess der FLEXi LCD Tastatur
- 06.03.2023
Anleitung zur Aktualisierung der Firmware des Trikdis FLEXi LCD-Tastenfelds.
Read More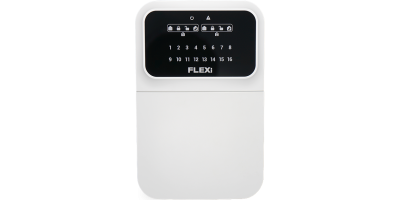
Trikdis FLEXi Keypad SK-LED button – Kurzanleitung
- 10.07.2025
Kurzanleitung für das Trikdis FLEXi SK-LED button Tastenfeld: Scharf-/Unscharfschalten, Codeverwaltung, Zonenüberbrückung und Notfallfunktionen.
Read MoreRelated Products

Trikdis FLEXi SP3 Ethernet Smart Alarmanlage Panel
intelligentes Alarmsystem, Ethernet-Alarmsystem
€139,90 Netto €113,74

Trikdis SK-LCD Button-Tastatur
Die FLEXi SK-LCD Tastatur ist eine zuverlässige und benutzerfreundliche Bedieneinheit mit LCD-Displa..
€67,90 Netto €55,20